Editing a passport photo might sound tricky, but with Adobe Photoshop, you can make sure your photo meets official standards without breaking a sweat. Whether it’s adjusting the background, resizing, or perfecting your facial features, Photoshop gives you all the tools you need. In this guide, I’ll walk you through every step, from opening your photo to saving a print-ready version. Ready? Let’s dive in!
Understanding Passport Photo Requirements
Before you even think about opening Photoshop, it’s essential to understand what makes a passport photo acceptable. Unlike casual selfies or social media pictures, passport photos are highly regulated, and every country has specific rules that must be followed. These rules are in place to ensure that your photo accurately represents you for identification purposes. Even minor deviations—like a slightly off-center head or uneven lighting—can result in your passport application being delayed or rejected. So, knowing the standards beforehand saves you time, frustration, and potentially the cost of having to retake your photo.
One of the most important aspects to consider is the size and composition of the photo. For most countries, the standard is 2×2 inches, or 51×51 mm. The face should take up a specific portion of the frame, with the eyes roughly aligned within a defined area from the bottom of the photo. Your head and shoulders should be fully visible, leaving just enough space above the head to avoid a cramped look. Cropping your image incorrectly is one of the most common mistakes, so paying attention to dimensions and proper alignment is critical.
Equally important is the background and lighting. Passport photos generally require a plain, light-colored background—usually white or off-white—with no patterns, objects, or shadows. Proper, even lighting is necessary to avoid harsh shadows or glare on your face. This ensures that your facial features are clearly visible, which is essential for recognition purposes. Many people overlook lighting, but subtle shadows or uneven brightness can make your photo unusable, even if everything else looks perfect.
Finally, your expression, attire, and head position matter just as much as technical factors. You should maintain a neutral expression—no smiles, frowns, or exaggerated emotions—and look straight at the camera. Clothing should be everyday wear, avoiding uniforms or bright patterns, and headgear is only allowed for religious reasons. Even small details, like glasses reflecting light or hair covering the eyes, can make a difference. The key takeaway is to follow official guidelines for your country closely, because each specification exists to help your photo pass strict identification requirements.
Setting Up Photoshop for Passport Photo Editing
| Step | Action | Recommended Settings | Tips & Notes | Common Mistakes to Avoid |
| Open Your Photo | Launch Photoshop and import your image | High resolution (300 DPI recommended) | Make sure the photo is clear and well-lit | Using low-resolution images can lead to blurry or pixelated final results |
| Open Your Photo | Navigate to File > Open and select your photo | Ensure the file format is compatible (JPEG, PNG, TIFF) | Avoid opening images directly from social media; use original files | Opening compressed images may reduce quality |
| Verify Image Quality | Check resolution and size | Ideally 300 DPI; minimum width and height based on passport requirements | High-resolution images allow better cropping, retouching, and printing | Ignoring resolution may result in rejected photos |
| Create a New Document (Optional) | Go to File > New to create a canvas for resizing | Set width and height to official dimensions (e.g., 2×2 inches); Resolution = 300 pixels/inch; Background Contents = White | Use this step when adjusting a photo to fit exact specifications without affecting the original | Not setting the correct dimensions can result in photos that fail official submission standards |
| Canvas Setup | Configure rulers, grids, and guides | Enable rulers (Ctrl+R / Cmd+R) and use guides to align the face | Helps maintain proper head position and eye level | Ignoring guides may lead to misaligned cropping |
| Layer Preparation | Duplicate the original layer | Keep an untouched background layer for safety | Allows non-destructive editing | Working directly on the original layer risks irreversible errors |
Cropping Your Passport Photo
Cropping is one of the most critical steps in preparing a passport photo. It ensures that your face is properly framed, aligns with official guidelines, and presents a professional, clean appearance. Below is a detailed list covering everything you need to do to crop your photo correctly in Photoshop.
- Open your photo in Photoshop and make sure it is high-resolution. Cropping works best with clear, well-lit images to preserve detail.
- Select the Crop Tool (C) from the toolbar. This tool allows you to define the exact portion of your image that will be included in the final passport photo.
- In the top options bar, enter the exact dimensions required for your country’s passport photo. For most countries, this is 2×2 inches (51×51 mm). Make sure the resolution is set to 300 DPI for optimal printing quality.
- Drag the crop box so that it frames your head and shoulders The top of your head should not touch the top edge of the frame, leaving a small margin for balance.
- Position your eyes approximately 25 inches from the bottom of the frame. This is the standard guideline to ensure facial features are centered and clearly visible.
- Center your face horizontally within the crop box. Use Photoshop’s rulers or guides (Ctrl+R / Cmd+R) to make sure the face is aligned perfectly.
- Make sure the shoulders are visible and not cut off at awkward angles. The crop should capture the upper body naturally without being too tight or too loose.
- Press Enter to apply the crop once the framing looks correct. Double-check the alignment before committing to avoid mistakes.
- Review the cropped image at 100% zoom to ensure no important features are cut off and the composition looks natural. Adjust slightly if needed.
- Leave a little extra space above the head to prevent the image from feeling cramped. This small margin ensures the photo looks balanced and professional.
- Avoid including unnecessary background areas. The focus should be entirely on your face, with minimal distraction from the surroundings.
- Recheck the dimensions after cropping to ensure they match official requirements exactly. Small deviations can cause rejection during submission.
- If needed, use additional guides or grids to verify the eye height and head position. This extra step helps maintain consistency across multiple passport photos.
- Remember, the goal is to produce a clear, neutral, and centered portrait that complies with all official guidelines, so take your time during this step.
Adjusting the Background
One of the most critical elements of a passport photo is the background. Most countries require a plain, light-colored background—usually white or off-white—to ensure the focus remains on your face. A messy or uneven background can cause your photo to be rejected, so it’s important to get this step right. Photoshop makes this process relatively simple, even if the original photo was taken against a busy or dark backdrop. Knowing how to adjust and refine the background properly ensures your final image meets official standards.
The first step in adjusting the background is selecting the existing background. The Quick Selection Tool (W) is ideal for this task, as it allows you to highlight the area around your head and shoulders quickly. Once selected, using the Select and Mask option helps refine the edges of your selection, making sure that hair, clothing, and subtle details are not accidentally erased. Adjusting settings like Feather and Smooth helps blend the edges naturally, which is particularly important when dealing with fine hair or uneven lighting.
After refining the selection, the next step is to remove the existing background. Pressing delete or using layer masks will eliminate the unwanted background while keeping your face intact. It’s best practice to work non-destructively by duplicating the original layer before making any changes. Once the background is removed, you can add a new layer filled with white or light gray. This ensures a consistent, clean, and official-looking background that is compliant with most passport photo requirements.
Finally, it’s important to check for common mistakes. Shadows or uneven lighting on the new background can make the photo look unprofessional or fail official guidelines. Make sure there are no objects, textures, or colors visible behind the subject. Also, avoid over-editing or making the background too bright, which can cause harsh contrast with the face. The goal is a smooth, neutral background that frames your face naturally, making it easy for authorities to verify your identity without any distractions.
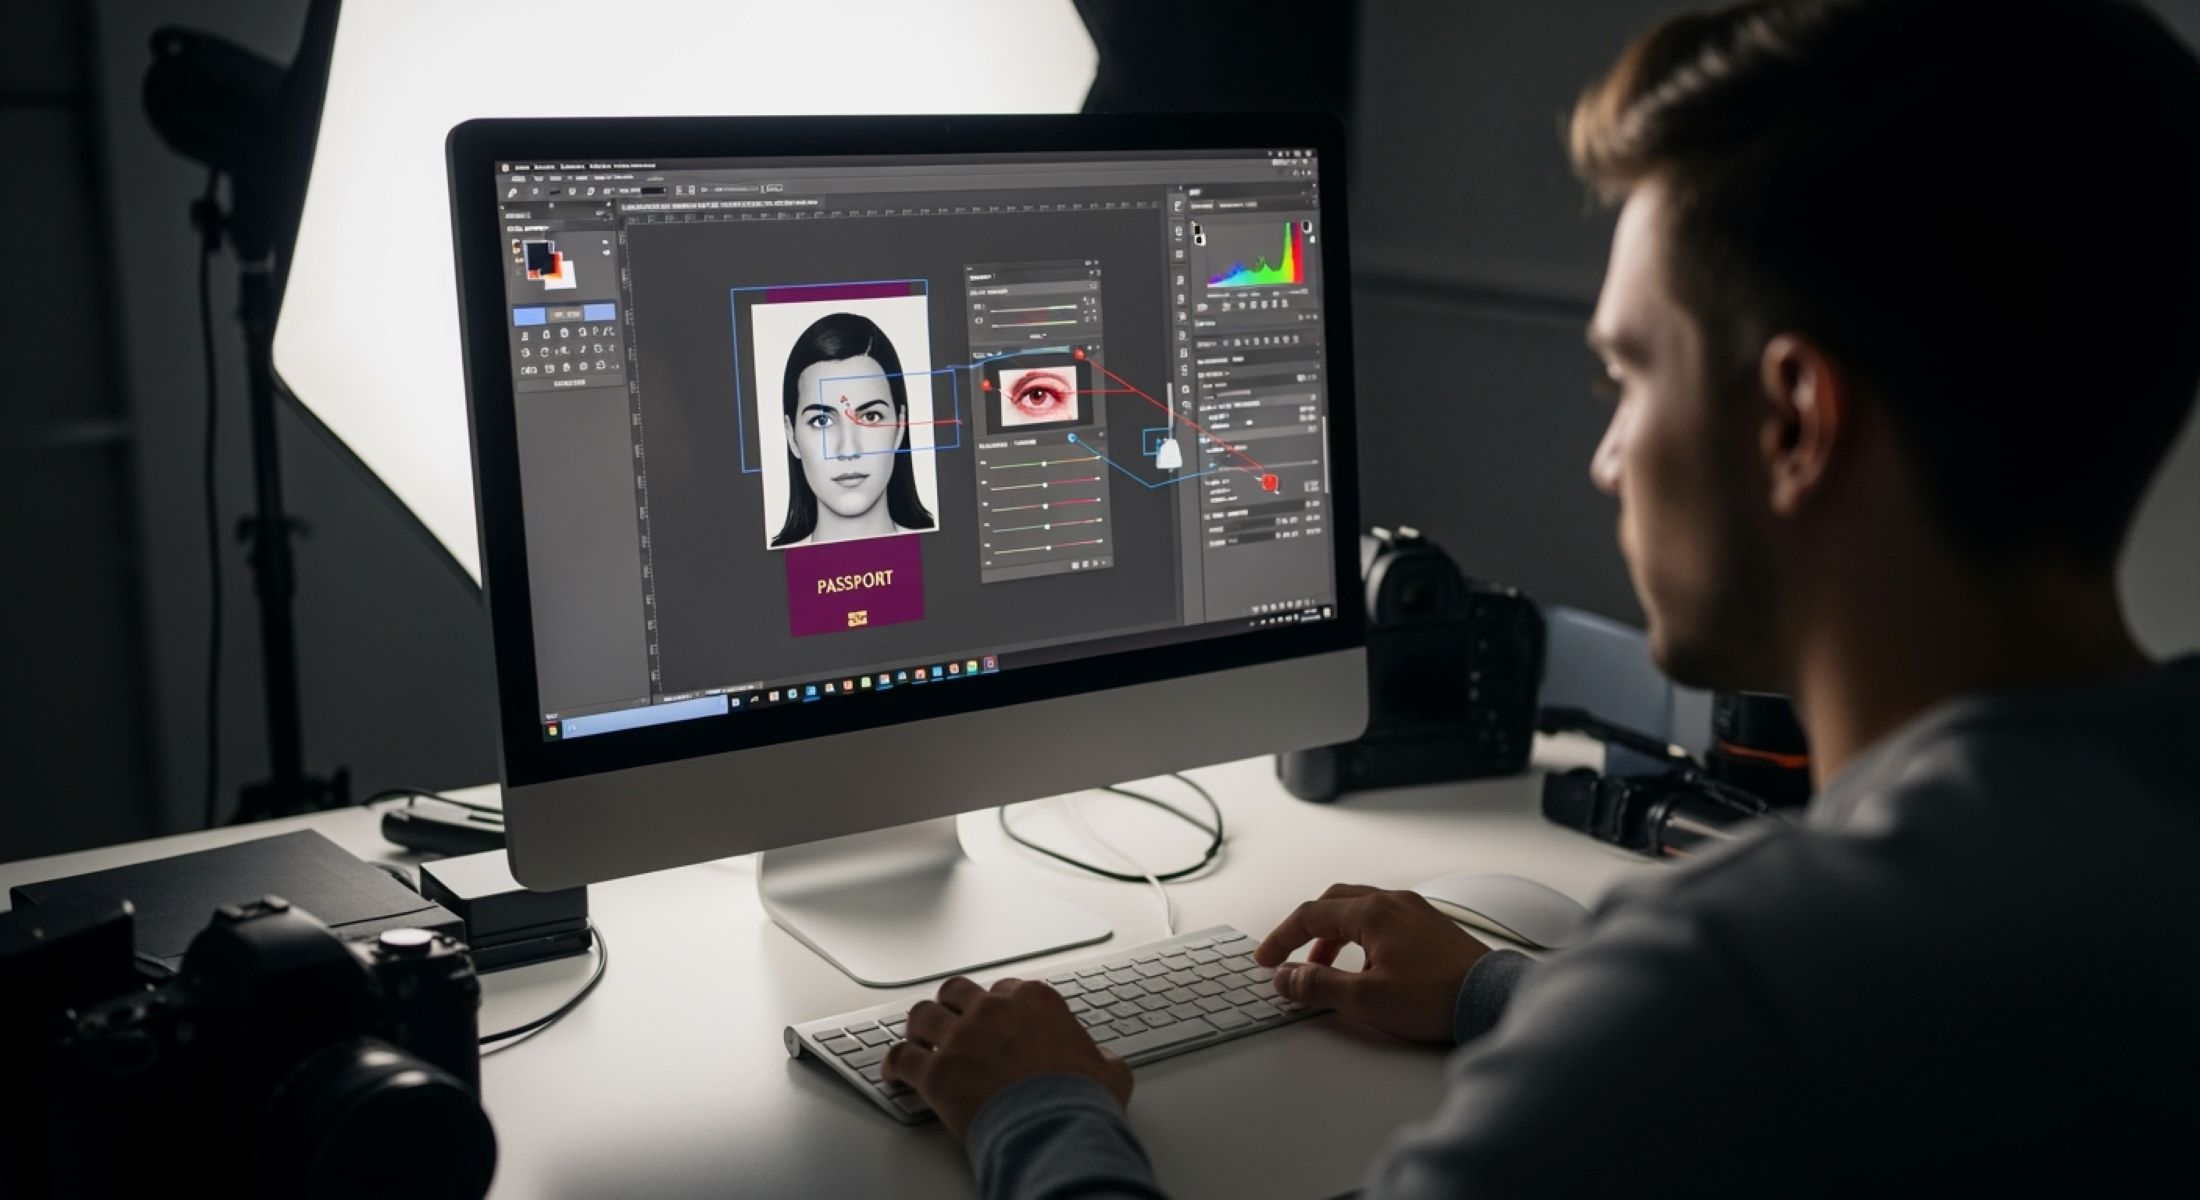
Retouching the Face
| Step | Tool / Action | Recommended Settings | Tips & Notes | Common Mistakes to Avoid |
| Blemish Removal | Spot Healing Brush Tool (J) | Brush size slightly larger than blemish; hardness ~50% | Click on pimples, scars, or minor marks; keep edits subtle | Overusing the tool can erase natural skin texture or facial features |
| Smooth Skin | Duplicate original layer | Keep background untouched | Use Filter > Blur > Gaussian Blur with radius 1-2 px; apply subtle effect only | Applying too much blur removes natural facial details and may fail passport standards |
| Layer Masking | Add a layer mask on blurred layer | Use black brush to mask areas you want sharp (eyes, eyebrows, lips) | Non-destructive editing keeps original details intact | Forgetting to mask key features can make face look unnaturally smooth |
| Eye Enhancement (Optional) | Dodge Tool | Midtones; exposure 5-10% | Brighten eyes slightly to make them look natural and clear | Over-brightening can make eyes look fake or edited |
| Teeth Whitening (Optional) | Hue/Saturation adjustment | Reduce yellow/orange hues slightly | Subtle whitening helps maintain a healthy, natural smile | Excessive whitening can appear unnatural and noticeable |
| Layer Management | Keep original and retouched layers separate | Name layers clearly | Allows easy adjustments or rollback | Merging too early may prevent fine-tuning and corrections |
Adjusting Brightness and Contrast
Proper lighting is one of the most important aspects of a passport photo. Even the best cropping or retouching can’t fix a photo that is too dark, too bright, or unevenly lit. Adjusting brightness and contrast in Photoshop ensures that your facial features are clear, natural, and compliant with passport standards. Here’s a detailed list to guide you through the process:
- Open your photo in Photoshop and ensure it is in a high-resolution format (preferably 300 DPI) to maintain clarity when adjusting brightness and contrast.
- Go to Image > Adjustments > Levels to start fine-tuning the lighting. Levels allow you to adjust shadows, midtones, and highlights separately, giving you precise control over the overall brightness and contrast of your photo.
- Drag the black point slider to adjust the darkest parts of the photo, making shadows subtle but not overpowering. Avoid making shadows too dark, as this can obscure facial features.
- Adjust the midtone (gray) slider to brighten or darken the mid-range areas of your face, ensuring a natural and even skin tone. The goal is balanced lighting that highlights facial details without exaggerating any features.
- Move the white point slider to adjust highlights. This helps make bright areas like the forehead or cheeks appear clear and properly illuminated, but be careful not to overexpose any part of the face.
- For more precise control, use Curves (Ctrl+M / Cmd+M). Curves allow you to adjust specific tonal ranges, letting you brighten eyes, soften shadows under the chin, or slightly lighten cheeks while keeping other areas intact.
- Pay attention to skin tones during adjustments. They should remain natural and consistent across the photo. Avoid overly warm or cool tones, which can make the photo appear edited.
- Check for harsh shadows or blown-out highlights, especially on the background. Even subtle background shadows can make a photo unacceptable for official use.
- Make incremental adjustments rather than large shifts. Subtle changes preserve natural texture, while large adjustments can make the photo look artificial or distorted.
- Zoom in to 100% view to check details like eye clarity, lips, and skin. Proper contrast adjustments should enhance these features without creating unnatural edges or color shifts.
- Consider using an Adjustment Layer for Levels or Curves instead of applying changes directly. This allows you to go back and tweak brightness or contrast without losing any original image data.
- Once satisfied, review the entire photo at actual size. Ensure your face is evenly lit, clearly visible, and that no areas appear too dark or too bright. Balanced brightness and contrast are essential for official passport photo compliance.
Leave a Reply