If you’ve ever applied for a passport online, you probably know the struggle of getting that perfect digital passport photo. The State Department is strict about their requirements, and uploading the photo incorrectly can lead to delays—or even rejection. Don’t worry, though—I’m here to guide you through the process step by step, so you can breeze through it like a pro.
Why the Digital Passport Photo Matters
You might think a passport photo is just a small, mundane detail, but in reality, it’s one of the most critical parts of your passport application. The photo serves as the primary reference for your identity, used by officials both in the U.S. and abroad. When traveling internationally, airport security, immigration officers, and airline personnel rely heavily on your passport photo to confirm that the person carrying the passport is the same individual to whom it was issued. A blurry, poorly lit, or outdated photo can create confusion, slow down security checks, or even lead to denied boarding. This is why taking a clear, compliant photo is more than a bureaucratic hoop—it’s essential for smooth travel.
Beyond travel security, a digital passport photo ensures consistency across various forms of identification. Think of your passport as part of a network of IDs you use throughout your life—driver’s license, visa applications, or government-issued ID cards. If your passport photo looks drastically different from your other IDs, it can cause problems in situations where identity verification is necessary, such as opening a bank account abroad, checking into hotels, or completing official paperwork in a foreign country. Officials expect your photo to match your current appearance as closely as possible.
The digital aspect of passport photos also introduces technical requirements that make proper submission critical. Unlike traditional printed photos, digital photos need to meet specific size, resolution, and format guidelines. Uploading an incorrectly formatted photo can result in automatic rejection by the State Department’s online system. This is why the rules around file type, resolution, and background color exist—they are not arbitrary but are designed to streamline identity verification, reduce human error, and ensure your application is processed quickly and efficiently.
Lastly, global standards play a huge role in why your digital passport photo matters. Every country has its own regulations regarding passport photos, and airlines adhere to these standards strictly. If your photo does not meet the international criteria, your passport may face delays in processing, or worse, be flagged for further verification. By following the State Department’s guidelines carefully, you ensure that your passport photo is universally recognized and accepted, minimizing travel complications and giving you peace of mind before you step on a plane.
Understanding State Department Photo Requirements
| Requirement Type | Specific Requirement | Why It Matters | Common Mistakes to Avoid | Tips for Compliance |
| Color | Must be in full color | Black and white photos may not clearly show your features | Using black-and-white or overly saturated photos | Use natural lighting to ensure accurate colors |
| Recency | Taken within the last 6 months | Reflects your current appearance | Old photos that no longer resemble the applicant | Retake photo if your appearance has changed |
| Face & Expression | Full-face view, neutral expression | Ensures officials can accurately identify you | Tilting head, smiling, or frowning | Keep head straight, eyes open, mouth closed |
| Background | Plain white or off-white | Prevents distractions and improves facial recognition | Patterns, shadows, or objects in the background | Use a plain wall or backdrop, avoid shadows |
| Size & Dimensions | 2 x 2 inches (51 x 51 mm) | Standardized for international and domestic use | Oversized or undersized photos | Use editing tools to crop to exact dimensions |
| Digital File Format | JPEG (.jpg or .jpeg) | Accepted universally by the online system | PNG, TIFF, or other formats | Save or convert the file as JPEG |
| File Size | Minimum 10 KB, Maximum 5 MB | Ensures file is neither too small nor too large | Exceeding max size or too compressed | Compress the file carefully without reducing quality |
| Resolution | 300 dpi recommended | Maintains clarity for identity verification | Low-resolution, pixelated photos | Use high-resolution camera or editing tools |
| Color Profile | sRGB (standard RGB) | Standardized for accurate color reproduction | Incorrect color profiles like CMYK | Check image settings before uploading |
| Orientation & Positioning | Portrait, head centered | Ensures photo meets automated verification systems | Crooked head, off-center placement | Align head and shoulders in the center of frame |
Step-by-Step Guide to Taking the Perfect Photo
Even before you start uploading your passport photo, the quality and accuracy of the image are critical. A clear, compliant photo can save you time, avoid delays, and ensure your application is accepted the first time. Here’s a detailed, step-by-step guide to taking the perfect digital passport photo:
- Choose the Right Location:
- Select a spot with even, natural lighting to prevent shadows and color distortions.
- Avoid fluorescent or dim lighting, which can cause yellow or greenish tints on your skin.
- Ensure the background is plain white or off-white, without patterns, textures, or objects.
- Make sure there is enough space around you so that your shoulders and head can fit comfortably within the frame.
- Consider standing about 4-6 feet away from the background to minimize shadows on the wall.
- Check for reflective surfaces nearby that might cause glare or unwanted highlights.
- Set Up Your Camera Properly:
- Use a smartphone or digital camera with a decent resolution (preferably 12 MP or higher).
- Place the camera on a stable surface or tripod to prevent blurriness.
- Position the camera at eye level, not above or below your face, to capture a natural perspective.
- Ensure the camera is in portrait orientation, with the lens parallel to your face.
- Make sure your face fills about 50-70% of the frame, leaving some space above the head and at the shoulders.
- If using a smartphone, consider turning off filters or beauty modes to maintain a natural appearance.
- Use the camera’s grid feature if available to align your face in the center.
- Pose for Success:
- Stand or sit straight with shoulders relaxed.
- Keep your head straight and facing the camera directly.
- Maintain a neutral expression—avoid smiling, frowning, or raising your eyebrows.
- Keep your mouth closed and your eyes fully open, looking straight into the lens.
- Ensure hair does not cover your eyes or face, especially eyebrows and forehead.
- Remove hats, glasses, or accessories unless they are required for medical or religious reasons.
- Keep your ears visible, and avoid tilting your head to one side.
- Take several shots to compare and choose the clearest, most compliant photo.
- Final Checks Before Capturing:
- Verify that the lighting is even, without shadows on the face or background.
- Make sure the background is clean and free of objects.
- Double-check that your clothing contrasts slightly with the background, avoiding colors that blend in.
- Confirm that your camera lens is clean to prevent blur or smudges.
- Ensure that the photo looks like your current appearance, taken within the last six months.
- Take multiple shots to select the best one that meets all State Department requirements.
Editing Your Photo for Submission
Once you have taken a high-quality raw image, the next step is to prepare it for submission. Editing a passport photo is not about adding filters or making it look glamorous—it’s about meeting the exact specifications set by the State Department. Even small mistakes like improper cropping, incorrect background color, or file size issues can result in your photo being rejected, causing delays in your passport application. Therefore, a careful, precise approach is essential when editing your photo.
Cropping and resizing the photo is one of the most critical steps in preparation. The State Department requires that passport photos measure exactly 2 x 2 inches (51 x 51 mm). Most photo editing software allows you to crop images to square dimensions and adjust the resolution to 300 dpi, which ensures that your image is sharp and clear. It’s important to center your head and shoulders within the frame during cropping so that your face occupies the appropriate portion of the photo, typically about 50–70% of the total image. Poor cropping, such as cutting off the top of the head or including too much background, can lead to automatic rejection.
Adjusting the background and brightness is another essential task. The background must be plain white or off-white, and any shadows on the wall or on your face must be eliminated. Editing tools can help remove minor shadows or inconsistencies, but it’s crucial not to overdo it. Extreme edits, filters, or artificial enhancements can make your face appear unnatural, which will violate passport photo rules. Brightness and contrast can be slightly adjusted to reflect natural skin tone and ensure the photo clearly shows your facial features, but subtlety is key—over-editing can be just as problematic as poor lighting.
Finally, saving the image correctly ensures that your edited photo will be accepted by the online submission system. The photo must be saved in JPEG format, which is the universally accepted file type for passport uploads. Choose a clear and descriptive file name, such as passport_photo.jpg, so it is easy to identify. The file size should fall between 10 KB and 5 MB; too large, and the system may reject it, too small, and the resolution may not be sufficient for official use. Following these editing and saving steps carefully ensures that your digital passport photo meets all technical requirements and avoids delays in processing your application.
Accessing the State Department Website
| Step | Action | Why It Matters | Common Mistakes to Avoid | Tips for Smooth Navigation |
| Access Official Portal | Go to the U.S. State Department passport portal | Ensures you are on the legitimate, secure website | Using unofficial or third-party websites | Bookmark the official website for quick access |
| Create an Account | Sign up with your personal details if new | Required to start or continue your passport application | Entering incorrect personal info | Double-check name, DOB, and contact information |
| Login | Enter your username and password | Accesses your application and secure photo upload section | Forgetting password or login details | Keep login info secure and use a password manager |
| Start Application | Begin a new passport application or renewal | Activates the portal sections for uploading photos | Skipping steps or selecting the wrong application type | Follow prompts carefully and select the correct option |
| Locate Upload Section | Find the photo upload feature | Required to submit your digital passport photo | Uploading in the wrong section or format | Look for “Upload Photo” or “Add Photo” button |
| Upload Photo | Click “Upload Photo” and select your JPEG file | Submits your compliant digital photo to the system | Using incorrect file format or exceeding file size | Verify JPEG format, file size (10 KB–5 MB), and dimensions |
| Confirm Submission | Review the photo preview and submit | Ensures the image meets all requirements | Ignoring preview, which may reveal errors | Always preview the photo before final submission |
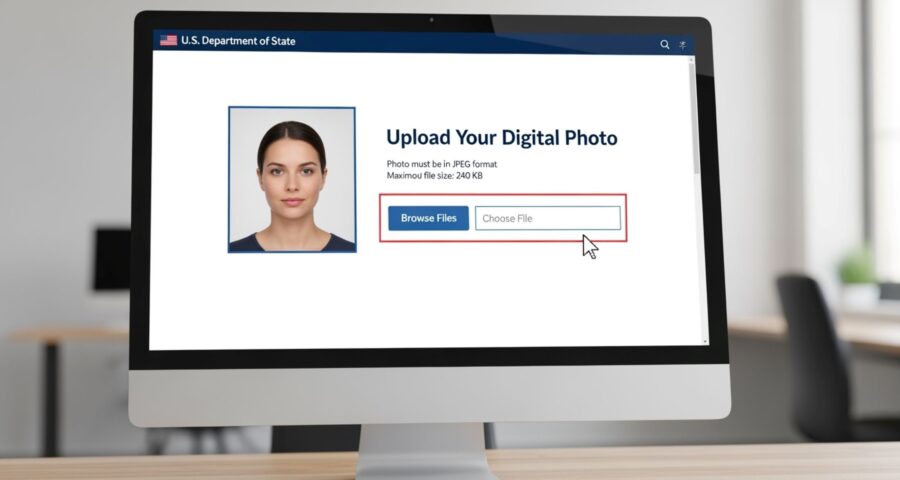
Uploading Your Digital Photo
Uploading your digital passport photo might seem intimidating at first, but if your image meets all the State Department requirements, the process is actually straightforward. Here’s a comprehensive guide to make sure your upload goes smoothly:
- Select Your File:
- Click the “Browse” or “Choose File” button on the State Department portal.
- Navigate to the folder where your prepared passport photo is saved.
- Make sure the file is JPEG format and meets the size requirements (10 KB–5 MB).
- Select the photo and click “Open” to attach it to your application.
- Double-check that you selected the correct file before moving on.
- Confirm Dimensions and Format:
- The system will usually automatically verify the file type and size.
- Some portals provide a preview of your photo, allowing you to ensure it is centered, clear, and properly cropped.
- Verify that the image is 2 x 2 inches (51 x 51 mm) or that it meets the portal’s automated requirements.
- Ensure your head is centered and occupies the correct portion of the frame.
- Adjust if Needed:
- If the preview shows that the photo is too large, too small, or off-center, use the crop or resize tools available on the website.
- Make sure adjustments do not distort your face or alter your natural appearance.
- Ensure the background remains plain white or off-white after any edits.
- Check that all facial features, including eyes, nose, and mouth, remain fully visible.
- Submit the Photo:
- Click the “Upload” or “Submit” button once the photo looks correct.
- Wait patiently for the system to process the upload; this may take a few seconds.
- Look for a confirmation message, such as a green check mark or a “Photo Uploaded Successfully” notification.
- Keep a screenshot or confirmation note for your records, in case you need proof of submission.
- Verify the Upload:
- After submitting, double-check that the uploaded photo is correctly displayed in your application profile.
- Ensure that the system has not resized or compressed it in a way that affects clarity.
- If there is any error, repeat the upload with the properly adjusted file.
- Avoid making multiple submissions unless necessary, as repeated uploads can sometimes delay processing.
- Final Tips for a Smooth Upload:
- Use a stable internet connection to prevent interruptions during upload.
- Avoid public Wi-Fi networks when submitting sensitive information.
- Keep a backup copy of your final, compliant photo on your device.
- Double-check that your file name is clear and easy to identify (e.g., jpg).
Leave a Reply