Getting a U.S. passport is exciting—it means travel, adventure, and opportunities to explore the world. But there’s one small hurdle that trips up almost everyone: the passport photo. You know the one—the official, seemingly unforgiving picture that will represent you for years. A common question pops up every time: “Can I smile in my passport photo?” Let’s break down the truth about facial expressions, rules, and tips to get a perfect shot without a grimace.
Understanding the Importance of Passport Photos
Before we dive into the rules about smiling, it’s crucial to understand why passport photos matter so much. A passport photo isn’t just a casual snapshot—it serves as a primary form of identification for you across the globe. Every time you cross a border, airlines, immigration officers, and government systems rely on that image to verify your identity. It’s not just about recognition; it’s about ensuring security, preventing identity fraud, and making sure that the person holding the passport is the rightful owner. In this sense, your passport photo acts like a biometric key to your identity in official systems worldwide.
The photo has to clearly show your face, eyes, and features, because even small details can make a difference. Officials use your photo to compare against you in person, and increasingly, automated facial recognition systems are employed. Any obstruction—like glasses with glare, hats, or overly expressive facial features—can interfere with these checks. It’s not just a bureaucratic formality; failing to meet these standards can lead to delays, denied entry, or having to retake your photo, which can be frustrating and costly, especially if you have travel plans.
Another crucial point is that your passport photo must be recent, generally taken within the last six months. Your appearance can change over time—hairstyles, weight, aging, or even minor changes in facial hair can affect recognition. Governments enforce this rule to ensure that your passport accurately represents your current look. This also explains why they are strict about makeup, facial expressions, and lighting: anything that alters or hides your natural features can cause inconsistencies between your photo and your real-life appearance.
Finally, the photo must follow strict technical standards, including size, background, and lighting. The standard U.S. passport photo is 2×2 inches with a plain white or off-white background and uniform lighting. Shadows, dark corners, or uneven lighting are unacceptable because they obscure key facial features. Think of your passport photo as your face’s official ID card to the world: it needs to be clear, accurate, and recognizable. Any deviation from these rules, even something as seemingly minor as an exaggerated smile, can result in rejection, so paying attention to every detail is essential.
U.S. Passport Photo Requirements: The Basics
| Requirement | Standard | Details | Why It Matters | Tips |
| Size | 2×2 inches (51×51 mm) | The photo must be exactly 2 inches by 2 inches in size. | Ensures consistency across passport photos and proper fit in official documents. | Use a professional photo service or measure carefully if taking at home. |
| Head Position | Facing the camera directly | Your head must be centered, facing straight forward without tilting. | Helps officials and facial recognition systems accurately identify you. | Keep your shoulders relaxed and look straight into the camera lens. |
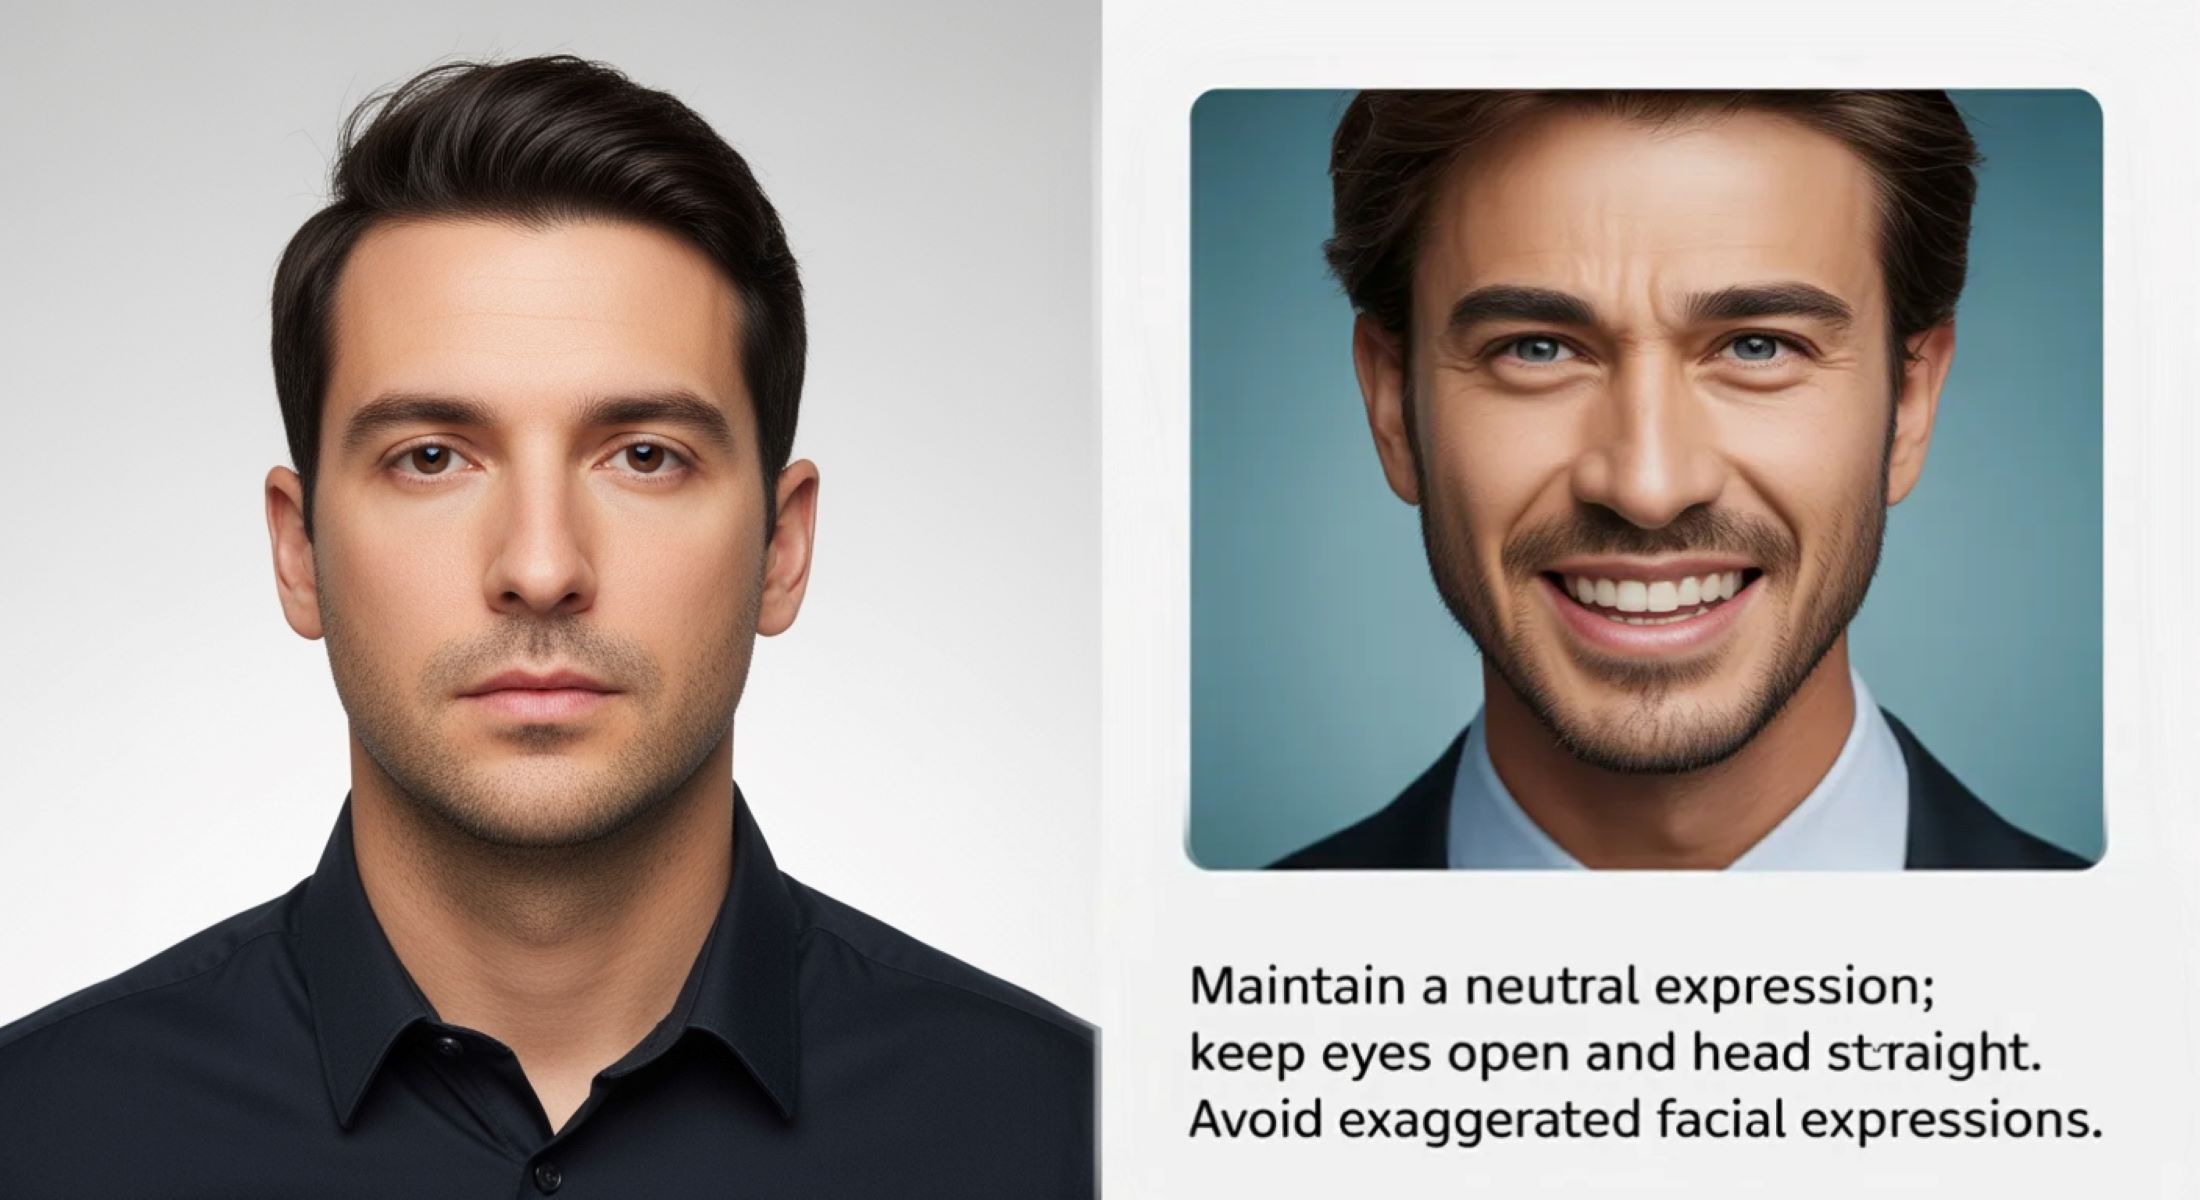
| Facial Expression | Neutral expression or natural smile | Slight, soft smile is allowed; no teeth showing. | Extreme expressions can distort facial features and interfere with recognition. | Think of a polite, subtle smile, like a professional headshot. |
| Background | Plain white or off-white | No patterns, textures, or shadows behind the subject. | A plain background provides contrast, making your face clearly visible. | Stand a few feet from the wall and ensure even lighting to avoid shadows. |
| Lighting | Even, no shadows or glare | Must illuminate your face evenly from all sides. | Shadows can obscure facial features and cause photo rejection. | Use natural light or soft lighting; avoid direct overhead lights. |
| Accessories | Glasses not allowed; hats/head coverings only for religious reasons | Glasses create glare and hats can block parts of the face. | Ensures all facial features, including eyes, are visible for identification. | Remove any glasses, headphones, or non-religious headwear. |
The “No Smile” Myth
Many people assume that passport photos demand a completely serious face, but that’s mostly a myth. While exaggerated expressions or showing your teeth are strictly prohibited, a subtle, natural smile is entirely acceptable. Here’s a detailed breakdown of what that means and how to achieve it:
- A neutral expression or a soft smile is allowed, giving your face a natural, approachable look without distorting your features.
- Avoid showing your teeth; even a slight open-mouth grin can change the shape of your face and risk rejection.
- Keep your lips relaxed and gently curved upwards—think of a polite, professional smile rather than a full grin.
- Eyes should remain open and visible; avoid squinting or narrowing your eyes when smiling.
- Maintain a straight head position, looking directly into the camera; tilting your head can make the smile look exaggerated.
- Avoid exaggerated facial expressions such as raised eyebrows, dimples from forced smiles, or playful pouts.
- Think of the smile used in professional ID photos or corporate headshots—it’s soft, subtle, and natural.
- Practice your smile in front of a mirror to find the balance between neutral and slightly happy without overdoing it.
- Consider your posture and facial muscles; relaxed shoulders and jaw help the smile appear natural.
- Avoid using makeup or lighting tricks to “enhance” your smile; the goal is authenticity and recognition.
- Remember that facial recognition systems rely on subtle, consistent features; extreme expressions can interfere with automated verification.
- For children, slight smiles are allowed, especially when neutral expressions are difficult to achieve.
- Keep in mind that a natural smile makes you appear friendly while still adhering to official standards.
- The key is balance: soft, controlled, subtle—never over-the-top or exaggerated.
- Imagine a professional scenario where you’re asked to “smile lightly for the camera”—this is exactly the type of expression that works for passport photos.
Why U.S. Passport Photos Limit Smiling
You might wonder why there are restrictions on smiling in passport photos. After all, smiling is natural and friendly—but in official identification photos, too much expression can create problems. The main reason is consistency. Passport photos are used to match your face across multiple security systems, border checkpoints, and immigration databases. A broad or exaggerated smile can distort facial features, such as the shape of your cheeks, jawline, and the contour of your lips. Even subtle changes can make it difficult for officials to verify your identity quickly and accurately.
Another critical factor is recognition technology. Modern passports often integrate biometric systems that rely on precise facial recognition. These systems analyze specific measurements and patterns, including the distance between eyes, nose shape, and jawline. Overly expressive smiles can alter these metrics, leading to mismatches or delays. In other words, what looks natural to a human observer may confuse automated systems, resulting in photo rejection or extra verification steps at border control.
Legibility is also a major concern. Passport photos are meant to display your facial features clearly, from your eyes to your chin. A neutral or slight smile ensures that nothing obstructs or distorts key features. For instance, wide grins can hide parts of the teeth, distort the cheeks, or even change the apparent width of the face. Subtle expressions maintain the integrity of your facial structure while still allowing for a friendly, approachable appearance, making identification straightforward for both humans and machines.
Ultimately, a slight, natural smile is acceptable, but anything extreme can render the photo unsuitable for official purposes. Think of it as balancing professionalism and approachability: the goal is to be recognizable, consistent, and clear. Your passport photo isn’t just a picture—it’s a critical tool for international travel, identity verification, and security. Paying attention to the limits on smiling ensures your photo serves its purpose without causing complications down the road.
Can You Show Teeth? Absolutely Not
| Rule | Explanation | Why It Matters | Potential Issues | Tips |
| Mouth Closed | Keep your lips gently closed without showing teeth. | Ensures facial features are consistent for identification purposes. | Open-mouth smiles distort jawline and mouth shape. | Practice a subtle, relaxed smile in front of a mirror. |
| No Teeth Visible | Teeth must not be visible in any part of the photo. | Teeth visibility can make your face appear wider or alter cheek structure. | Facial recognition software may have difficulty matching the photo. | Think of a soft, professional smile without showing teeth. |
| Lips Relaxed | Avoid pressing lips together tightly or stretching them unnaturally. | Maintains natural facial contours and avoids tension in the face. | Tight or exaggerated lips can look forced and impact photo acceptance. | Relax your jaw and lips before taking the photo. |
| Facial Symmetry | Keeping your mouth closed supports symmetrical appearance. | Symmetry is critical for both human inspection and automated verification. | Asymmetrical smiles or open-mouth expressions can lead to rejection. | Look straight into the camera and keep your head centered. |
| Professional Appearance | Closed-mouth, neutral or slight smile conveys a professional look. | A professional look ensures your photo passes official scrutiny. | Overly expressive smiles are considered inappropriate for passports. | Imagine a corporate headshot rather than a casual selfie. |
Neutral vs. Natural Smile: What’s the Difference?
Understanding the difference between a neutral expression and a natural smile is essential for a passport photo. While it may seem subtle, these distinctions can determine whether your photo is accepted or rejected. Here’s a comprehensive breakdown:
- Neutral Expression: No smile at all, lips relaxed and closed naturally.
- Eyes should remain open, clear, and focused directly at the camera.
- Facial muscles should be relaxed—avoid tension in the jaw, cheeks, or forehead.
- Head should be centered and facing straight toward the camera, with no tilt.
- Neutral expression ensures maximum consistency for both human inspection and facial recognition software.
- Avoid attempting to force a “serious” look; it should still appear natural, not stiff.
- Natural Smile: Slight, subtle upward curve of the lips without showing teeth.
- Smile should be gentle and controlled, more like a polite headshot than an exaggerated grin.
- Eyes remain open and relaxed; avoid squinting or narrowing when smiling.
- Facial muscles, including cheeks and jaw, should stay relaxed to prevent distortion.
- A natural smile adds warmth to your photo while still maintaining professional and official standards.
- Avoid overdoing the smile; extreme expressions can interfere with biometric recognition.
- The smile should convey friendliness but not distract from the clear visibility of your facial features.
- Think of a natural smile like the one used in professional ID photos or corporate headshots—soft, approachable, and subtle.
- Ensure your head remains level and shoulders relaxed to complement the subtle smile.
- Remember that even a small difference in expression can impact facial recognition software, so moderation is key.
- Practice in front of a mirror to achieve the balance between neutral and slightly happy without exaggeration.
- Avoid using filters, makeup tricks, or lighting adjustments to “enhance” the smile; the goal is authenticity and clarity.
- For children, natural smiles are acceptable as long as they are subtle and do not obscure facial features.
Tips for a Perfect Passport Photo Smile
Getting the perfect subtle smile for your passport photo might seem harder than it sounds, but with a little practice, it’s entirely achievable. One of the most effective strategies is to practice in front of a mirror. This allows you to experiment with slight curves of your lips until the smile feels natural and relaxed. By practicing, you can identify the exact level of subtlety needed—enough to appear friendly without showing teeth or exaggerating your expression. This practice can also help you become more comfortable and confident in front of the camera, which translates into a better, more natural-looking photo.
Relaxing your facial muscles is equally important. Tension in the jaw, cheeks, or forehead can make even a neutral expression look forced or unnatural. Before taking your photo, take a few deep breaths, consciously relax your shoulders and jaw, and let your lips settle into a gentle curve. Small adjustments, like loosening your tongue or softening your gaze, can make a significant difference. A relaxed face not only looks better but also ensures that your facial features are accurately captured for identification purposes.
Another helpful tip is to think of something positive or pleasant while posing. Happy thoughts naturally soften your facial features and help you achieve a subtle, authentic smile without overdoing it. This mental trick is particularly useful if you feel nervous or tense in front of the camera. By imagining a pleasant memory or simply thinking “I’m confident and calm,” you can maintain a gentle, approachable expression that still meets official requirements.
Finally, pay attention to technical details like chin position and makeup. Keep your chin level—tilting it up or down can distort the natural appearance of your face and affect how your features are captured. Avoid heavy makeup or exaggerated contouring, as it can create shadows that obscure facial features, potentially causing your photo to be rejected. The key is to aim for a balanced, natural look: relaxed facial muscles, a slight smile, and a neutral posture that together ensure your passport photo is both professional and acceptable by all official standards.
Leave a Reply